How to Know When It’s Time for a Main Sewer Line Replacement?
Main sewer line replacement is a critical task that homeowners may face at some point. The main sewer line is a crucial component of a home's plumb... Read More
Same-Day Service Available
Need a Plumber in Knoxville? We’re Ready to Help!


To install a shower drain, position the drain body, connect the outlet to the waste pipe with proper slope, secure it with a locking nut, and use gaskets to create a watertight seal. After the main installation, double-check all connections for tightness, and then test the drain for leaks by running water before sealing and tiling.
Installing a shower drain creates a slope and a channel to move water from the shower area into your home’s plumbing system. Proper installation prevents standing water, protects the shower floor from damage, avoids leaks, and keeps the bathroom clean.
Tennessee Standard Plumbing installs and repairs shower drains with advanced tools and methods. The team ensures proper slopes, leak-free drains, and smooth water flow. The new installations, upgrades, and repairs keep your bathroom working well.
Check the shower area and pick the best spot for the drain. Place it near the center or slightly to one side so water runs straight into it. Make the floor slope slightly toward the drain, about ¼ inch for every foot (6 mm for every 30 cm). This slope helps water flow and stops puddles from forming.
Then decide the drain depth and how you secure the drain. It depends on the subfloor. Subfloor refers to the layer of material that lies beneath your tiles or shower pan. Subfloors are wood or concrete. Wooden subfloors are found in homes with basements or raised floors. Concrete subfloors are found in ground-level slabs.
Decide on drainpipe diameter and depth. Pipes are typically 2 to 3 inches (5–7.5 cm) in diameter. Shallow pipes work on slab-on-grade showers. Deeper pipes are required when the shower is located above a basement or when plumbing runs through floor joists. Planning ensures you avoid cutting or rerouting pipes later.
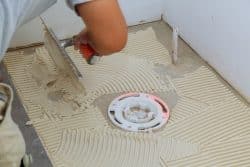 Remove existing tiles, vinyl, or other floor coverings above the drain spot. Use a tile cutter or saw to avoid breaking surrounding tiles. Mark the area before cutting so you do not cut too much.
Clean the subfloor completely. Remove debris, old mortar, or adhesive. A clean, solid subfloor gives the drain a stable base and prevents future leaks. Inspect the wooden subfloors for signs of rot or damage. Damaged wood must be replaced to stop sagging or water damage.
Check for obstacles under the floor. Look for pipes, electrical wires, or heating lines. Knowing what is below avoids cutting into them by mistake. Adjust the drain location slightly if obstacles are in the way.
Set the drainpipe on the spot you marked. This pipe moves water from the shower to your home’s main plumbing line. Make sure the top of the pipe lines up with the finished shower floor. Keep the floor sloped a little toward the drain, about ¼ inch per foot, so water flows easily and does not pool.
Use Polyvinyl Chloride (PVC) or Acrylonitrile Butadiene Styrene (ABS) pipes. PVC and ABS are strong plastic pipes commonly used for plumbing. Use a pipe diameter of 2–3 inches (5–7.5 cm), depending on shower size and plumbing codes.
Check the pipe for cracks or debris. Hold the drain pipe in place with brackets or clips so it does not move. Keeping it steady stops leaks, water backup, and damage to the shower floor later.
The drain body is the part that sits on the floor and connects to the pipe. Attach it using threaded fittings, compression nuts, or special glue called solvent cement. Make sure it is tight and sits level with the floor for proper drainage. The flange is the flat rim of the drain that sits on the floor and holds the drain cover.
Level the drain with a spirit level. The drain must sit flush with the shower floor. Misalignment causes water to pool around the drain instead of flowing into it. Tighten all connections carefully.
Check the slope around the drain. Minor adjustments at this stage ensure the shower drains correctly and keep the subfloor dry.
Cover the shower floor and the area around the drain with a waterproof membrane. A membrane is a thin layer that keeps water from soaking into the floor underneath. Extend it a few inches past the drain flange so water cannot leak.
Use liquid waterproofing or sheet membranes, depending on your floor type. Smooth out any wrinkles and press it firmly against the subfloor. Pay attention to corners and joints because water leaks at these points.
Seal around pipe penetrations with an extra layer of membrane or sealant. Let the waterproofing cure fully before installing the shower pan or tiles. Proper waterproofing prevents water damage, mold, and weakening of the floor structure.
Place the shower pan or build a mortar bed for a tile base. The shower pan is a preformed base made from acrylic, fiberglass, or metal. It guides water into the drain. The tile base is constructed with mortar and tiles, working in the same manner.
Maintain a slope of ¼ inch per foot toward the drain. Check the slope with a spirit level to make sure water flows freely. Press the tiles or the pan firmly into the adhesive or mortar. Leave a small gap around the drain flange for proper drainage.
Check for uneven spots and fix them with thin-set mortar or shims. Correct installation protects tiles, grout, and the subfloor from water damage over time.
Put the drain cover on top of the drain flange. Pour some water into the shower and watch how it flows. Water should go straight into the drain without forming puddles.
Check around the drain for any leaks. Tighten the connections or apply plumber’s putty or silicone if water escapes. Testing like this makes sure your shower is ready to use and protects the floor from water damage later.
Keep the drain cover removable for easy cleaning. Regular maintenance prevents clogs and keeps water flowing efficiently.
A shower drain is the part in your bathroom that takes water from the shower floor and sends it into your home’s plumbing. It collects the water and keeps it moving so the floor does not get wet or slippery. A good drain keeps your bathroom clean and dry.
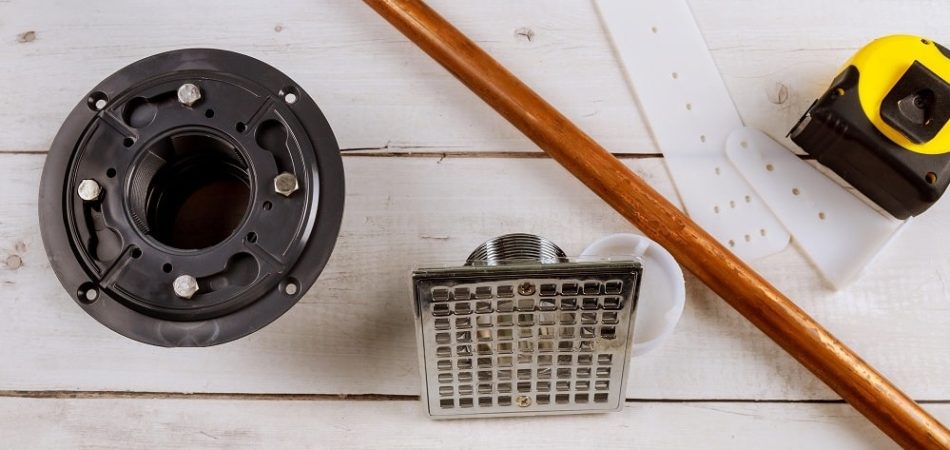
The main parts of a shower drain are the drain body, flange, drain pipe, and drain cover. The drain body sits on the floor and connects to the pipe. The flange is a rim that sits flat on the floor to hold the cover and seal the edges. The pipe carries water to the main plumbing line. The cover stops hair and debris from going down the drain.
Installing the shower drain correctly stops leaks and water damage. It makes sure water flows straight into the drain and keeps your shower floor dry. Leaving the cover removable makes cleaning easy and ensures the drain remains functional for years to come.
The different types of shower drains include linear, center, and tile-in, and many more. Each type has its own style, works best in certain showers, and needs a different way to install.
The 7 main types of shower drains are:
Linear drains are long, narrow drains that run along one side of the shower floor. They are commonly found in walk-in showers and wet rooms. They look modern and sleek and drain water quickly along their length. Installation is complex and costly, but they are easy to clean and handle large water flows efficiently.
Center drains sit in the middle of the shower floor. Water flows from all sides toward the drain. They are common in standard showers and small bathrooms. They look classic, and drain well when the floor slopes evenly. Installation is simpler than that of linear drains, but the floor slope must extend in all directions to move the water properly.
Point drains are small, single drains usually placed in the center or corner of the shower. They work well in small showers, are simple in design, and handle average water flow. They are low-cost and easy to install but require accurate floor slopes in all directions and more care to clean.
Tile-in drains hide under the floor tiles for a seamless, modern look. They are commonly found in luxury or high-end bathrooms, blend seamlessly with the floor, and provide effective drainage when installed correctly. Installation is tricky and costs more, and cleaning requires extra care, but they offer a very stylish finish.
Corner drains are installed in a shower corner to conserve space and work well in small showers or tight bathrooms. They are simple, functional, and drain water efficiently. Installation is easy, and maintenance is simple, but they handle less water than center or linear drains and are less common in modern designs.
Wall-mounted drains are connected along the shower wall, rather than the floor, and are suitable for wet rooms or custom showers. They direct water toward the wall and do not need a slope in the middle of the floor. Installing them is more complex and costly, but they give a modern look.
Hidden drains are fully concealed beneath tiles or panels, creating a smooth, minimalist floor. They are popular in luxury bathrooms, look very clean, and provide good drainage. Installation is complex and more expensive, and cleaning requires specialized tools, but they provide the smoothest and modern appearance.
Choose a shower drain based on your shower size, floor layout, style preference, and how easy it is to clean. Picking the right type makes water flow smoothly, keeps your floor dry, and makes maintenance simple.
The type of shower drain that is right for your setup depends on the size of your shower, the shape of the floor, and the style you want. A good drain helps water flow quickly, keeps the floor dry, and makes the bathroom look neat and modern.
Linear drains are most effective in walk-in or curbless showers. Center or point drains are suitable for small or standard showers. Tile-in drains are ideal for luxury bathrooms.
Drains are available in materials such as stainless steel and PVC (polyvinyl chloride). Stainless steel is a strong, long-lasting material that does not rust. PVC is light, cheap, and easy to work with. The right material has a significant impact on both the lifespan of the drain and its ease of maintenance.
Check the shower slope and floor layout when picking a drain. Ensure the floor slopes slightly toward the drain to allow water to flow properly. Plan the drain location before putting in tiles or the shower pan. Proper planning ensures water flows smoothly, facilitates easy cleaning, and prevents leaks later.
Removing an old shower drain begins with planning, getting the correct tools, and carefully uninstalling the drain. A drain removal is necessary when it leaks, clogs, or when you want a new one. Removing it properly safeguards your pipes and shower floor against becoming hazardous.
The 7 key steps to accomplish are:
Gather a screwdriver, pliers, adjustable wrench, putty knife, and bucket. Wear gloves to prevent cutting your hands on the sharp metal edges and dry-out caulk. Have a rag available to catch dripping water. The job is simpler and safer with all the tools at hand.
Wipe everything off the shower floor. Put a towel or plastic sheet down to prevent tile damage and catch dirt. Get the area dry and well-lit. A clean workspace allows you to work effectively and safely.
Remove the drain cover or grate by unscrewing it with a screwdriver. Keep the screws in a safe place. This lets you access the drain body directly.
 Step 4: Loosen the Drain Body
Hold the drain body in a wrench or pliers and turn slowly. Twist slowly around the edges in a balanced way. Check areas that are stuck and push them slightly. Slowly loosening avoids cracking the pipe or tiles. It releases the drain from plumbing without damage.
Scrape away old plumber’s putty, silicone, or caulk from around the drain flange with a putty knife or scraper. Scrape away all of the old residue so the opening is free and clear. This removes old sealant so the new drain seats and seals properly.
Hold the drain body firmly and pull straight up. Don’t let it fall onto edges or tiles. Ensure the pipe below is not pushed out of position. Check the drain for damage, rust, or cracking. Gentle removal of the drain leaves the pipe in a single piece and sets the stage for reinstallation.
Scrape out and clean the drain opening to get rid of the remaining excess putty, rust, or dirt. Ensure that the edges of the pipes are smooth and the floor is free of dirt. A clean opening traps excess putty securely and does not allow future leaks.
When removing the old drain, if you notice rust, stuck parts, or damaged pipes, call a plumber. They have the right tools and experience to remove the drain safely. Tennessee Standard Plumbing provides expert drain repair and installation for all showers. The team handles old, clogged, or damaged drains quickly, keeping your bathroom safe and fully functional.
The tools you need to install a shower drain include a screwdriver, pliers, a utility knife, and more. Having all your tools ready makes the job faster and safer. Using the right tools also helps prevent damage to your pipes and shower floor.
The main tools you need are:
Adjustable pliers hold and turn nuts, pipes, or fittings. They give a strong grip on the drain body when tightening or loosening. Pliers make it easier to handle parts without scratching tiles or pipes.
A pipe wrench or drain wrench helps secure the drainpipe and fittings tightly in place. It allows you to turn metal or PVC pipes without slipping. This tool ensures the drain is leak-free and sits properly on the shower floor.
Screwdrivers remove or install screws on the drain cover or other fittings. A flathead works for slotted screws, and a Phillips fits cross-head screws. Keeping screws tight helps prevent wobbling or leaks.
A utility knife trims excess sealant, caulk, or plumber’s putty. It also cuts small sections of pipe if needed. A sharp utility knife makes clean cuts and helps seal the drain properly.
Plumber’s putty or silicone forms a watertight seal around the drain flange. Putty is soft and easy to shape, while silicone stays flexible and lasts longer. A good seal stops water from leaking under the shower floor.
A measuring tape helps you place the drain in the right spot. Accurate measurements ensure the drain aligns with the shower slope for proper water flow.
A level ensures the drain sits flat and the shower floor slopes correctly toward it. Correct slope guides water into the drain and prevents puddles. A level keeps the installation precise.
Polyvinyl Chloride (PVC) cement and primer bond PVC drain pipes together. Primer cleans and softens the pipe surface, while cement fuses them for a strong connection. Using these makes the drain strong and leak-free.
Optional tools include a hacksaw to cut pipes, gloves to protect your hands, and a flashlight to see in dark or tight spaces. These tools make installing the shower drain easier, save time, and help the drain fit properly without leaks.
To dry-fit and align the new drain, you have to place the drain body in the opening, check its position with the pipe below, and make small adjustments for a proper fit. Dry-fitting is the process that checks that everything lines up before using sealant or adhesive. It stops leaks, uneven water flow, and problems with the shower floor later.
The main steps to dry-fit and align include:
Gently put the new drain body into the opening. Make sure it stands upright and does not tilt. Doing this carefully helps you see how it fits and get it ready for alignment.
Look under the shower floor to see if the drain lines up with the pipe. Adjust it until it matches perfectly. Correct alignment prevents leaks and helps water flow straight into the pipe.
Move the drain body slightly to center it in the opening. Make sure it is straight and steady. This makes sure the drain fits properly and won’t move after installation.
Press the flange so it sits flat on the shower floor or pan. Check that it is level with the surface. A flush flange stops water from pooling around the drain and keeps the floor looking neat.
Put the gasket or rubber seal under the drain flange. Make sure it is centered and not folded. A proper seal stops leaks when you finish installing the drain.
Lightly put the drain parts together without using putty or silicone. Check that everything fits and moves smoothly. This temporary assembly shows how the final installation will work.
Look at the slope of the shower floor and the drain opening. Make sure water flows toward the drain. Correct orientation avoids puddles and keeps the shower working well.
Lift the drain out gently without moving it. Notice how it sits in the pipe and on the floor. Removing it carefully keeps the alignment ready for the final installation with sealant or adhesive.
During the whole process, check for common issues during dry-fit, such as misalignment with the pipe, uneven floor surfaces, or incorrect drain depth. Fix these before final installation to avoid leaks, uneven water flow, and problems with the shower floor.
Common shower drain installation mistakes include wrong drain size, poor drainage, wrong pipe connections, and skipped steps. These drain problems cause leaks, slow drainage, water damage, and uneven floors. Avoiding these mistakes keeps your shower working properly and saves money on repairs.
Here are the 10 common mistakes to watch for:
Placing the drain off-center or tilted makes water pool and drain slowly. Check that the drain aligns with the pipe and sits level on the shower floor. Adjust it before sealing to keep water flowing properly.
Not sealing around the drain lets water leak under the shower floor. Apply plumber’s putty or silicone and cover the area with a waterproof membrane. Effective sealing prevents the floor from becoming wet and protects it from damage.
Tightening the parts too much causes the drain or pipe to crack. Turn nuts and fittings firmly but carefully. A proper fit holds the drain securely without breaking anything.
Using the wrong pipe size and loose connections slows drainage and causes leaks. Match the pipe diameter to the drain and join them tightly. Check that water flows smoothly through the pipes.
Not dry-fitting the drain risks a poor fit and misalignment. Assemble the drain without sealant first to see if it sits correctly. Fix any issues before the final installation.
A drain that does not fit the shower floor leaks or causes water to pool. Pick a drain that suits your shower pan and layout. Follow the manufacturer’s recommendations for your type of shower.
Dirt, old putty, or rust stops the seal from sticking. Scrape and wipe surfaces clean before applying putty or silicone. A clean surface ensures a strong and leak-free seal.
Skipping a water test hides leaks that cause damage to the floor later. Pour water into the drain and watch carefully. Fix any leaks before tiling or finishing the shower.
A flat or uneven floor makes water puddle. Keep a slope of about ¼ inch per foot (6 mm per 30 cm) toward the drain. A proper slope lets water drain quickly and keeps the shower dry.
Not following the instructions risks wrong installation. Refer to the guide specific to your drain model. Instructions help you install the drain correctly and ensure it remains functional for years to come.
Pay close attention to each step and double-check your work. A small mistake now leads to big problems later. Take your time, use the right tools, and follow the right process to keep your shower drain working smoothly for years.
To properly secure and connect a new shower drain, place the drain body in the opening, add the gasket and washer, then tighten the locking nut. Then connect the drain outlet to the waste pipe and check all joints. Doing this the right way keeps water from leaking and protects your shower floor.
The 8 steps to follow include:
Put the drain body straight into the shower opening. Make sure it sits flat and steady. This helps water flow well and prevents pooling.
Slide the rubber gasket and washer under the shower base. Keep them centered around the drain body. They form a seal that stops leaks.
Twist the locking nut onto the drain body with your hands first. Check that it goes on smoothly without slipping. Hand-tightening helps avoid damage.
 Step 4: Tighten the Locking Nut Firmly Using Pliers or a Wrench
Use pliers or a wrench to finish tightening the nut. Don’t use too much force to avoid cracks. A snug nut keeps the drain secure.
Point the drain outlet straight toward the waste pipe. Adjust the angle so water flows easily. Good alignment prevents leaks and slow draining.
Connect the outlet to the waste pipe with the right fitting. Make sure it feels snug and has no gaps. A tight fit keeps water from escaping.
Hold the parts steady so they don’t move. Check that the pipes don’t wiggle. A secure connection lowers the risk of leaks later.
Check every nut, fitting, and joint again. Make sure they are all tight and level. A final check ensures your drain is ready to use.
Professional plumbers help if the setup is tricky or the bathroom is old. They make sure everything is solid, sealed, and leak-free.
Tennessee Standard Plumbing offers expert drain installation services. The team keeps your shower leak-free and works efficiently on remodels or new construction projects, giving peace of mind for your home.
Need reliable help with your professional drain installation in Knoxville? Contact us today.
To fix a loose shower drain, tighten the locking nut under the shower base using pliers or a wrench. Check that the drain body sits level and the gasket or washer is properly in place. Remove any old sealant and apply fresh plumber’s putty or silicone around the flange. Make sure all connections to the waste pipe are secure to stop movement and prevent leaks.
Installing a shower drain takes 1 hour to a full day. Time depends on the type of drain, floor material, and whether you need to adjust or cut plumbing pipes. Preparing tools, dry-fitting the drain, and applying sealant all take extra minutes. Complicated setups or older bathrooms take longer.
Yes. You need a permit to install a shower drain. Many local building rules ask for a permit before doing plumbing work. Permits make sure all pipes are the right size, connections are correct, and there are no leaks. Check your city or county rules before you start. Getting a permit helps you avoid fines and makes sure your work is safe and follows the code.
The best tips to look for when choosing a shower drain include picking one that fits your shower style, like a linear drain for walk-in showers or a center drain for regular stalls. Look at the material. Stainless steel lasts longer, while PVC is cheaper. Make sure the drain works with your shower’s slope, pipe size, and water flow. Drains that are easy to clean save time, and a proper fit helps prevent leaks.
Safety precautions you should take when installing a shower drain include wearing protective gloves to avoid cuts from metal edges or caulk. Keep the work area dry to prevent slips. Use proper tools like pliers and wrenches, and avoid overtightening to prevent damage. Lay down a towel or sheet to protect the tiles. Work slowly and carefully around pipes and fittings to avoid leaks or injury.
To install a shower drain, it typically costs between $150 and $1000. The exact cost depends on the labor and materials, drain type, shower size, and plumbing complexity. High-end drains or complicated setups, like retrofitting an old bathroom, cost more. Additional costs include waterproofing materials, tiles, or any necessary adjustments to existing plumbing to ensure a leak-free installation.
For proper drainage, the shower floor should slope about ¼ inch per foot (6 mm per 30 cm) toward the drain. This helps water flow easily and stops it from pooling. Measure the slope carefully across the floor and adjust the tiles or shower pan if needed. Too little slope makes water stand, and too much slope makes the floor uneven or hard to walk on.
To measure the shower drain size needed, measure the diameter of the existing drainpipe or planned waste pipe. Common drain sizes are 2 inches (50 mm) for most showers. Consider the drain type, shower size, and local plumbing codes. Check the flange opening on the shower base to ensure a proper fit. Accurate measurement prevents leaks and ensures proper water flow.
Your new shower drain is leaking due to misalignment, missing gaskets, or improper sealing. Check that the drain sits level and the gasket or washer is centered. Remove old putty or silicone and apply fresh sealant around the flange. Tighten the locking nut securely, but avoid cracking the drain or base. Proper connections to the waste pipe are essential to stop leaks.
Yes. You can reuse the old drain flange if it is not cracked, rusted, or warped. Clean it thoroughly and remove old sealant. Check that it fits snugly on the new drain body and seals properly. Worn or damaged flanges should be replaced to ensure a leak-free connection and prevent water damage under the shower floor.
The best sealant for a shower drain is silicone sealant. Silicone is strong, flexible, and water-resistant, so it makes a long-lasting seal. Put a smooth layer around the drain flange, press it down firmly, and wipe off any extra. Using silicone sealant the right way stops leaks and keeps your shower floor dry.
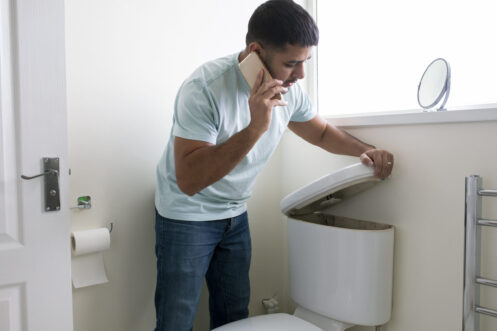
The benefits of professional toilet replacement services are proper alignment, secure pipe connections, and leak-free performance. Professional toilet installers make sure the flange is lined up correctly, the pipes are connected properly, and there are no leaks. They handle tricky setups, old plumbing, or uneven floors. Experts work fast and safely, helping to prevent water damage and expensive repairs.
To install a smart shower drain with sensors, line up the drain correctly, and connect it securely to the waste pipe. Follow the manufacturer’s instructions for placing the sensor and wiring. Apply silicone or plumber’s putty around the drain flange to prevent leaks. Connect the drain to the smart control system, test water flow, and confirm the sensor works. Make any necessary adjustments before completing the installation.


Main sewer line replacement is a critical task that homeowners may face at some point. The main sewer line is a crucial component of a home's plumb... Read More

Hydro jetting is an effective, non-invasive plumbing method that employs high-pressure water to eliminate tough blockages and deeply clean the insi... Read More
You should have a cracked toilet professionally repaired to prevent major damage like costly water leaks, structural damage to your subflooring, an... Read More